Are you a photo enthusiast or professional that’s getting frustrated by slow export speeds in Photoshop that are hampering your editing times? When it comes to videography or photography, you need to be able to rely on your computer and software in order to save you vast amounts of time.

Photo by Domenico Loia on Unsplash
Time is money, and quick photo editing or video editing enables you to exceed customer expectations when it comes to the turnaround of deliverables. Photoshop tricks that speed up your workflow won’t help you if you’re still getting stuck on export. With this in mind, read on to learn all about five true and tested tips and tricks for faster Photoshop export!
1. Adjust the Memory Usage
When it comes to Photoshop editing and visual production, professionals should always utilize this tip in order to speed up any kind of content creation. The more memory you allocate to Photoshop, the faster it will run!
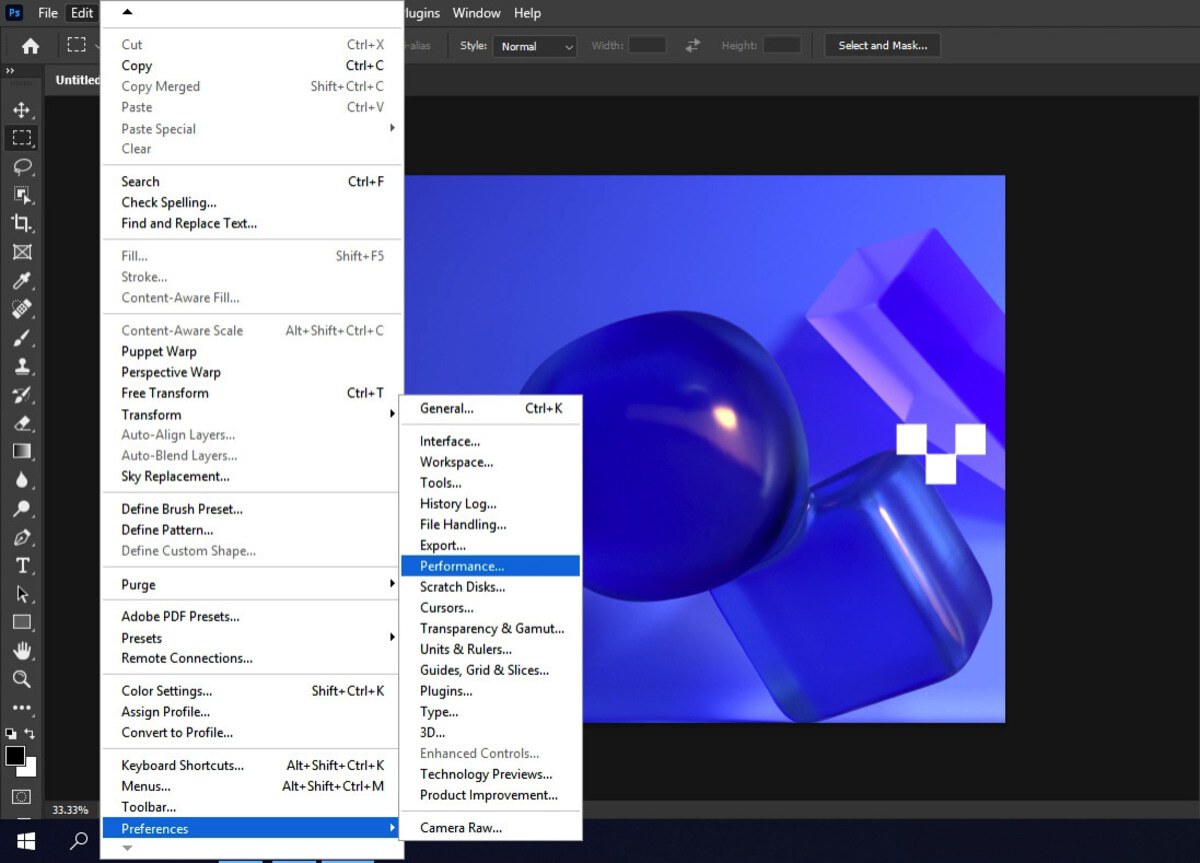
You can adjust the memory by navigating to Edit > Preference > Performance.
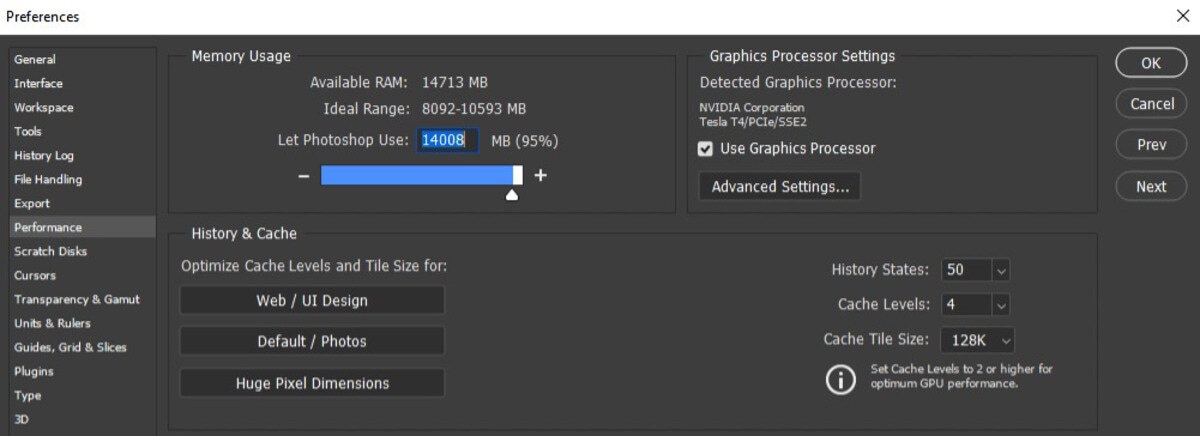
Under Memory Usage, you’ll see that Photoshop most likely has the default set to 70%. We recommend raising it by 5% and seeing how that improves the speed.
2. Reduce History and Cache
The next easy step for faster editing in Photoshop and exporting is to reduce the history and cache settings. You can do this by navigating to the same window where you adjusted the memory. If you often work with large files, we recommend setting the cache levels to 4.
You can also adjust the history states so that the amount of actions Photoshop saves is lower. Consider your own editing skills and adjust accordingly! This will indirectly increase your export times.

3. Use Quick Export
After working on the images with Photoshop, it’s time to upload them to the web. The easiest way to save your images for online viewing is to export them with the Quick Export option. To customise this function if you are a MAC user go to Photoshop> Preferences> Export, instead if you are a WINDOWS user go to Edit> Preferences> Export. The default format used by Photoshop is PNG, this is because it is the one most used by graphic designers and web designers since they work with files that have transparent areas, but if you are a photographer and you work mainly with photographs then you will opt for a JPG format.
So if you don’t use transparent areas, the best format in which to save your images is definitely JPG with a quality index between 80% and 100%. My advice is to set the quality of the file to 80% because you get images that are very similar to those saved at the highest quality, but with a much lower weight, perfect condition if you have to upload your photos online.
You can choose to let Photoshop always ask you where you want the file to be saved or tell it to save it in the same folder where the source file is. Also I suggest you to insert the copyright and contact details in the metadata of all your photographs.
The last item visible is that of the colour space, make sure the checkbox is checked.
It is very important to check the Convert to sRGB box because this is the colour space that is used by most browsers to read images. If once uploaded online your images have a strange colour, different from the original, it may be that they have not been converted to the sRGB colour space during export.
Now you can quickly and easily save your photos, which are ready to be uploaded to the internet. Just go to File> Export> Quick Export as JPG and choose which folder to save the file to.
4. Disable Compression
When it comes to common Photoshop tips for digital media, many sources may tell you to export smaller file sizes. However, you may find that exporting them is still too slow.
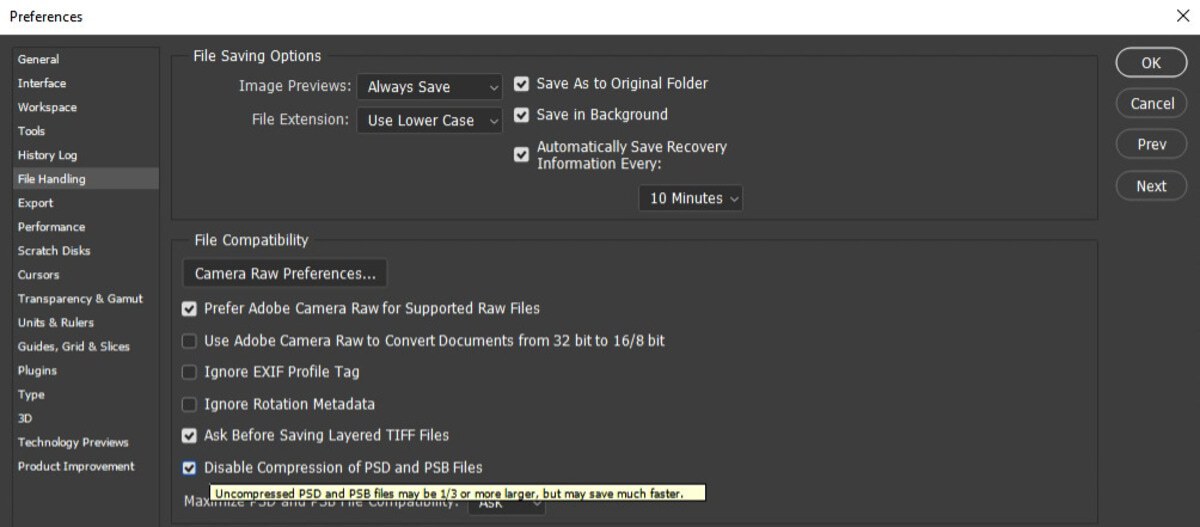
In the File Handling and File Saving menu, click on Disable Compression of PSD and PSB Files.
While this will increase the size of your files, exporting them will be considerably faster.
5. Speed Up Your Photoshop Exports with Vagon
Are you tired of staring at the progress bar while exporting large files in Photoshop? Vagon is here to accelerate your export speeds. By using Vagon’s cloud-based high-performance computers, you get to work on a powerful desktop with 4 x 16GB CUDA activated Nvidia GPUs. This setup not only accelerates your export times but also allows for a smoother workflow in Photoshop, regardless of your local machine’s capabilities. Now, you can transfer your files and apps with just a few clicks. Start working on heavy Photoshop projects and export them effortlessly, saving precious time for more creative journeys.
No more staring at the progress bar, it’s time to unleash your creativity without any holdups. You can check it yourself within just a few clicks.
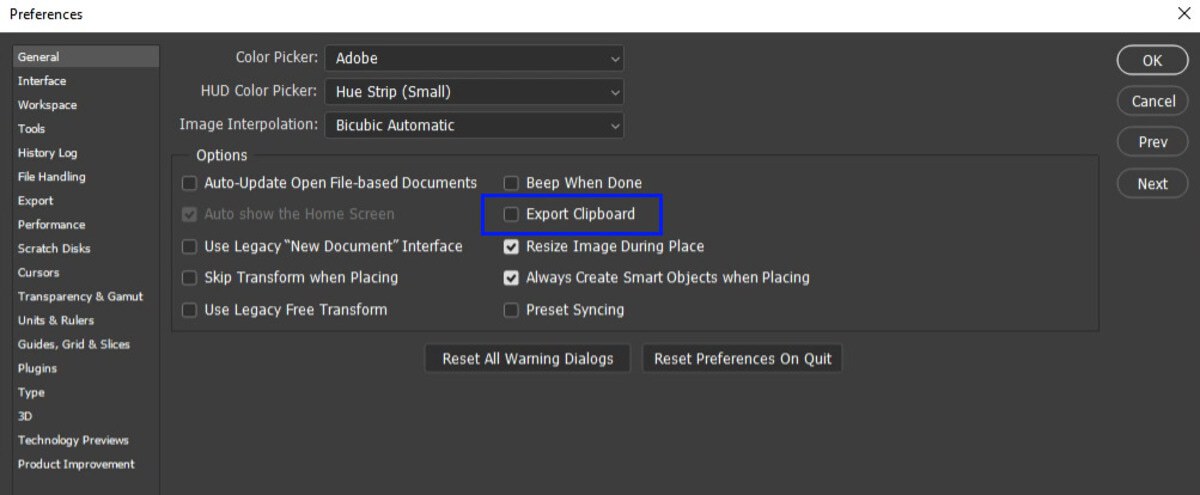
6. Turn Off Export to Clipboard
Exporting to the clipboard is something you’ll only need if you need to copy a file and paste it into another app. However, many users rarely use this functionality and it slows down the software!
Disable it by navigating to Preferences > General. You’ll find an option to uncheck Export Clipboard.
7. Use Virtual Memory Disks
When the RAM memory that has been allocated to it is not enough Photoshop begins to record temporary information on virtual memory disks, which is nothing more than the amount of free space on your hard disk. It is advisable to set a fast disk as primary virtual memory, but at the same time it is not your hard disk where the operating system resides.
You can also use an external drive connected to a USB port or Thunderbolt port. Connection speed and disk speed affect Photoshop performance, so the best choice I can suggest is to opt for a Solid State Drive (SSD) connected to a USB 3.0+ port or a Thunderbolt 2.0+ port.
To set virtual memory disks go to the Preferences panel accessible from the Photoshop> Preferences> Virtual Memory Disks menu if you are a MAC user, or from the Edit> Preferences> Virtual Memory Disks menu if you are a WINDOWS user.
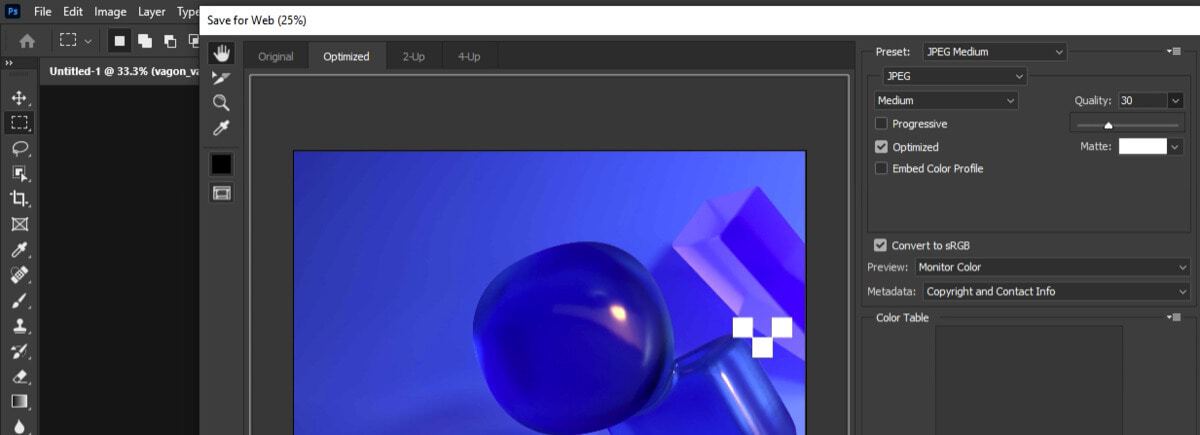
8. Choose the Right Quality
Last but not least, speeding up your photo exports may be as simple as knowing the right options to choose. After clicking on the Save for Web option, make sure you’re choosing a quality between 40 and 60.
Any more than 60 is unnecessary and may be too large for websites. You’ll also find that they save much faster!
9. Set the Colour Profiles
Photoshop offers tons of options when it comes to colour space. Some colour spaces are wider than others and allow the use of a wider range of colours during the post production phase. In most cases it is advisable to work with the colour space that allows you to use as many colours as possible ie ProPhoto RGB.
To set ProPhoto RGB as the primary colour space, go to the Edit> Colour Settings menu and from the RGB drop-down menu choose the ProPhoto RGB option. Make sure you check the “ask before opening” and “ask before pasting” checkboxes for the “Profiles not matching” and “Profiles not present” options.
Whenever you open a file with Photoshop and the colour space embedded in the file does not match the colour space of your workspace (ProPhoto RGB) the program will give you three options to open the document:
- Use embedded profile (instead of workspace)
- Convert document colours to workspace
- Delete embedded profile (do not manage colours)
Unless you are working for some graphic project intended for the web (and therefore you will opt for the first solution “Use embedded profile”, thus maintaining the document colour space) the option to select is the second “Convert document colours to workspace ”, in this way you can work on your photography using the best Photoshop colour space available, ProPhoto RGB. If you need to export your photograph to upload it online, all you have to do is use the quick export as JPG command - which I covered just before - and Photoshop will convert the ProPhoto RGB colour space into sRGB colour space (optimal for viewing on the web ) while exporting the file.
Conclusion
When it comes to speeding up your editing and exporting times in Photoshop, it also combines down to a combination of factors. Follow our tips, learn about some common Photoshop shortcuts, and keep your cool.
You’ll find that in no time, you’ll be able to deliver clients’ finished results in less time than they expected.
Looking for more ways to speed up your photo and video production times without breaking the bank? Try Vagon today to speed up your workflow through the cloud!