Blender is an open-source 3D modeling and animation software often used by animation artists, product designers, and game creators. Not only allow users to create 2D objects or characters and animate them to obtain 3D models, but Blender also has a strong community of artists and computer scientists behind it, constantly improving the code to deliver powerful software without the hefty price tag.
Many creators, and professionals are creating contents and publishing courses in Blender community to help them while they are adopting Blender to their workflow. However, beyond its popularity, Blender still has one major drawback for users: It can take a really long time to render projects when finalizing an intensive project.
Blender is able to use your computer’s central processing unit (CPU) or graphics card (GPU)—or both—for rendering. To eliminate render wait times, you might consider investing in multi-core processors and GPUs with a high CUDA core count.
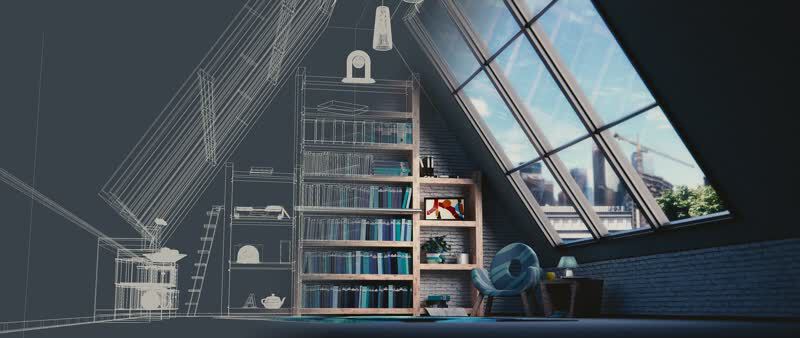
Image by Lennart Demes from Pixabay
Before you go out and buy expensive upgrades to your existing hardware, here are a few suggestions to help you minimize your rendering times.
Tip #1: Reduce Samples
While using as many samples as possible allows Blender to create clearer images and models, each new sample means another second to work on rendering it.
By limiting the number of samples, you can greatly reduce your rendering time.
Keep in mind that obtaining fewer samples will affect the quality of the final product, so it’s best to use this method for web-only projects instead of those that require viewing on larger screens.
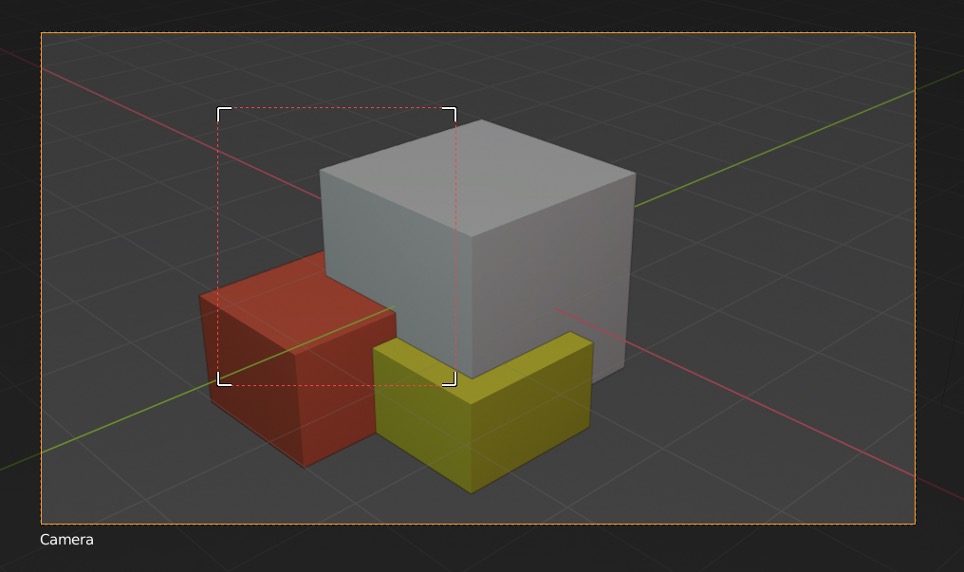
Tip #2: Do Selective Rendering
An easy way to speed up the rendering process is to stop rendering the entire image and start rendering only the region of the image that interests us most at that specific moment. You can do this by pressing “Shift + B” and dragging on the camera window. This marquee selection tool will ensure that only that particular area is rendered.
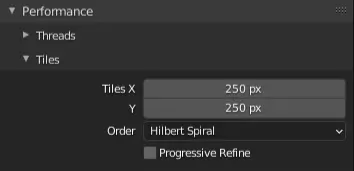
Tip #3: Optimize the Tile Size
Tiles are small black boxes that appear on the screen when the blender rending the scene.
Tile size is an important factor to minimize your rendering times.
When you increase the number of tiles, the tile size will become small and it can focus on a smaller portion of your scene. And all cores work on the render until it’s finished without one core finishing before another. So, by optimizing the tile size your rendering time will minimize.
Blender was always capable of increasing the number of tiles, but recently with the code update, you could also change the tile sizes. GPU can only render one tile at a time, while CPU renders multiple tiles at a time, so for optimizing tile size it needs CPU.
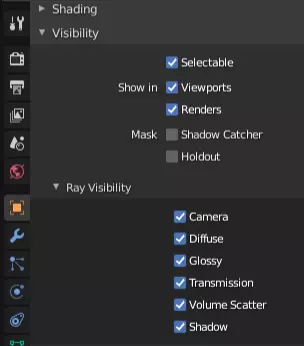
Tip #4 Disable Shadows
Shadows and other visual effects require more processing time when it comes to rendering. If your project has too much effects and shadows in it, the rendering time of your project will takes longer than expected.
If the shadows you used in your project are not too fundamental for your work, you can disable them to improve your projects rendering duration.
Tip #5: Focus On Your Scene
What appears in the render image should also correspond to the “physical” work that was done to create the set. It is useless to model objects, create materials and sets of lights for parts of the project that will not be displayed in the render. Concentrate on the scene to be achieved and forget the rest of the project; if the same foresees several images from different points of view, plan the images as in a storyboard.
Don’t improvise. For each render, list the point of view, the props, the necessary materials, the finishes, the technical details and the criticalities that you can foresee. This phase will save you time both in the execution of this project and in the next ones.
Tip #6: Speed Up Your Rendering with Vagon
When the goal is to cut down rendering times, every second saved is a victory. But what if you could do more than just save a few seconds?
With Vagon’s cloud PCs powered by 48 cores, 4 x 24GB RTX enabled Nvidia GPUs and 192GB of RAM, watch your Blender projects render faster than ever. It’s easy to use, right in your browser. You can transfer your workspace and files in just a few clicks and try it yourself!
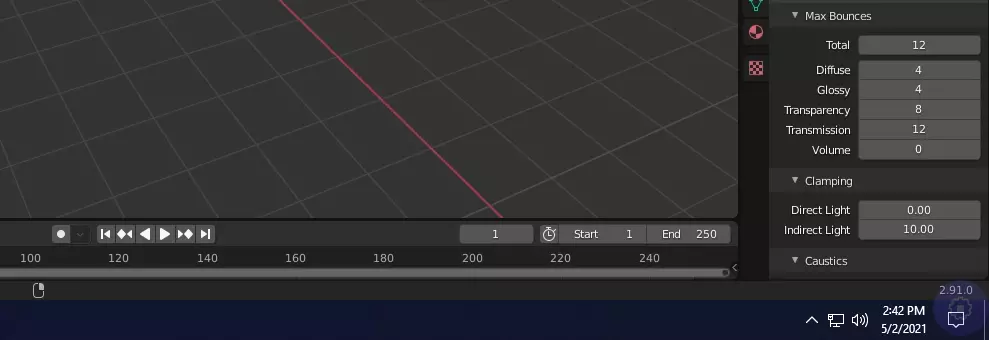
Tip #7: Adjust Clamp Values
Indirect and Direct Clamp values are some other settings you can balance between your render output quality and render duration. While both Clamp values reduce the noise over light bounced samples to increase the accuracy of the image, direct clamp affects the pixels which are not bounced yet, and indirect clamp affects the pixels which are bounced multiple times.
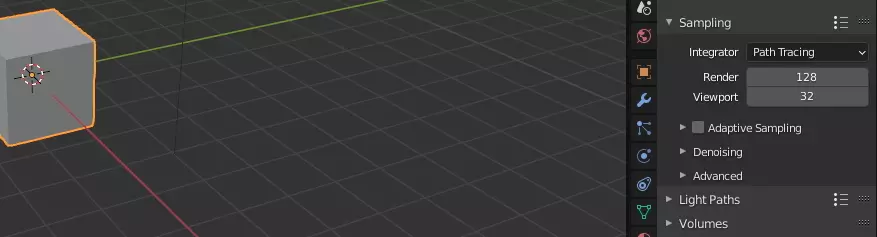
Tip #8: Enable Adaptive Sampling
It’s not as new and popular as Cycles X, but last year Blender released Adaptive Sampling in Blender 2.83 to reduce rendering times by reducing sample sizes for complex scenes. By using Adaptive Sampling you can easily distribute the processing power efficiently.
Just go to the Samples tab in Blender, and check the Adaptive Sampling checkbox.
Tip #9: Activate Denoising
Denoising is another alternative way to reduce your rendering times. If you have an OptiX compatible GPUs, you can activate Denoising to increase your image quality by decreasing the number of noises in your rendering output. OptiX engine uses AI to remove noises in your image.
You can check the Denoising parameters from the official Blender guide. To activate denoising go to the Denoising tab in Blender, and adjust your settings according to your output preferences.

Tip #10: Use the Render Layers
A true help is made available directly by Blender through the Render Layers. Obviously the problem is not fully solved, but an appropriate use of this tool allows us, especially in the case of numerous changes to our 3D scenes, to circumvent exhausting waiting times by modifying and rendering only the model concerned.
Tip #11: Switch to GPU Rendering
The GPU, which was designed primarily for fast image creation, uses a graphics card for rendering. CPU and GPUs are basically similar in how they are handled.
However, the GPU is much more powerful and, unlike CPU technology they can process the instructions of many cores from start to finish at the same time. This will allow your render times to be 10 times faster.
The use of CPU and GPU Rendering depends on usage necessities. The architectural industry may benefit from CPU rendering, which takes longer, but generates higher quality images in general.
Moreover, industries that are specifically designed to manage complicated, graphics-intensive processing, virtual reality, and artificial intelligence innovation such as architecture, animation, film, and product design may benefit more from GPU rendering.
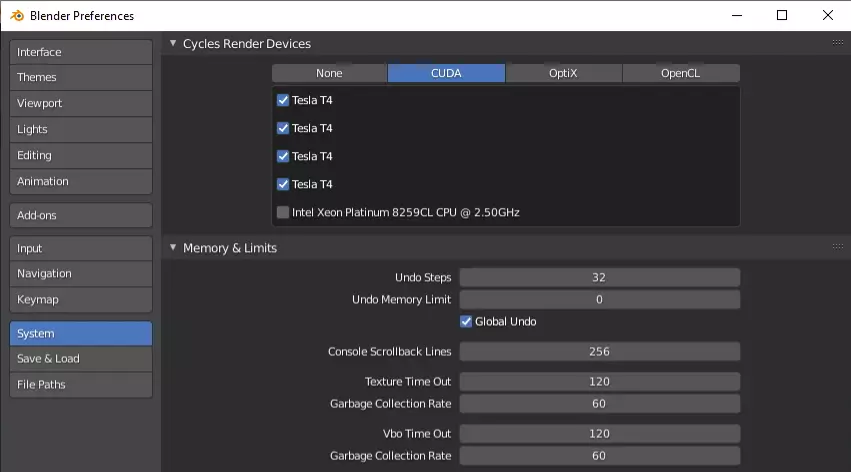
You can switch your Blender Render Settings with going into the Preferences > System > Cycles Render Devices from CPU to GPU.
Tip #12: Remove Unnecessary Polygons
A polygon is a shorthand for a filled, closed shape, unlike in regular geometry, where a polygon is not always needed to be filled.
Not all scenes need the highest quality settings. For example, those that are blurry or focus on a distant object require less intricate information, meaning you can drop unnecessary polygons and reduce the render duration.
This approach, known as Level of Detail (LOD), is often used in game development, and there are various courses explaining how to do it.
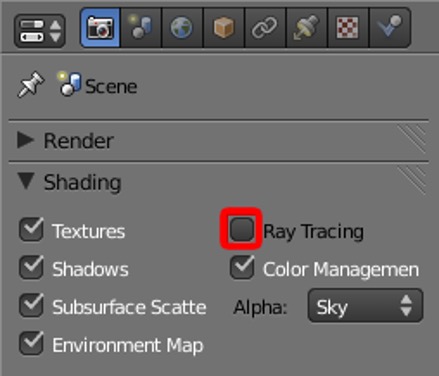
Tip #13: Deactivate Ray Tracing
Nothing drains a CPU’s power quite like ray tracing. This feature is essential when creating realistic lighting, but it is resource-intensive and can drastically increase your render times. This can be annoying if you’re on a tight schedule.
If you’re using cycles, you can’t turn off the ray tracing; it’s an inherent part of the way cycles work.
The older Blender internal renderer performs most of the work using scanline rendering instead of ray tracing. This can’t do certain things, like reflections, so you had the option of turning on ray tracing just to cover those bits. Turning it on would disable certain things, but it would make the render run faster.
In cycles, everything works by ray tracing, so switching it off would speed up your render, but you’d only be able to render entirely black images.
Disable ray tracing globally in the Render menu’s Shading panel. Enable Ray tracing globally from the same panel.
Tip #14: Disable Ambient Occlusion
You use ambient occlusion (AO) to create soft shadows in a scene. This is particularly valuable when there is indirect lighting. However, implementing ambient occlusion requires many hours of rendering.
Disabling ambient occlusion can save time if the scene doesn’t need indirect shadows. You can use the AO pass instead to achieve a similar effect without slowing the rendering process.
Tip #15: Improve Speed By Checking the CPU Cores
The number of cores (threads) can dramatically slow down or speed up the rendering process. This is because the number of tiles calculated during the render is equal to the number of threads used. A CPU render engine has two options for detecting the number of threads: auto-detect and fixed.
Many rendering engines are set to auto-detect by default. Verifying all CPU cores are used to cut rendering times is worthwhile. You can set the renderer to “fixed” and specify the number of cores to use, which is helpful if you’re unsure whether all your CPU cores are being detected.
Tip #16: Disable Unnecessary Features And Programs
It’s easy to overlook the processes running in the background when rendering. You can speed up the rendering process by halting all the unused processes and plugins. It’s crucial to note which features you can do without. For example, disable the motion graphics if you don’t need motion blur.
Minimizing the features and applications frees up extra power for rendering and saves time by decreasing the render duration, and prevents application from unexpected crashes and issues.
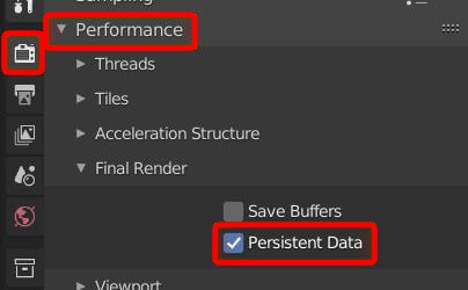
Tip #17: Activate Blender’s Persistence Data
When you click on the render button, the system calculates and caches the first frame of your scene. The following frames depend on the cached information from the first frame, meaning your scene’s components are no longer recalculated in every frame, drastically improving your rendering speed.
Persistent Data works great for still scenes like interior architectural renderings but doesn’t support caching animated objects yet and increases memory consumption. You can activate this feature by heading to Render Properties, selecting the ‘Performance’ tab, then the ‘Final Render’ subtab, and selecting ‘Persistent Data’.
Tip #18: Reduce your Cycles X Sampling Count
Sampling is a render option in the Cycles X rendering engine. It determines the number of light computations required to render a scene. As the sample count increases, the precision of the light calculations improves. This results in a cleaner render but also an increased render time.
Having a higher sample count is usually beneficial. But there’s a point where more samples are barely noticeable. Conducting a performance test will help determine the best sample count for clean and fast render.

In Blender 3D, you can configure the most samples, least samples, noise threshold, and time limit.
Navigate to Render Properties > Sampling > Render to adjust the sample counts. Set the Max Samples value to 500 samples and increase until satisfied with the quality of the render.
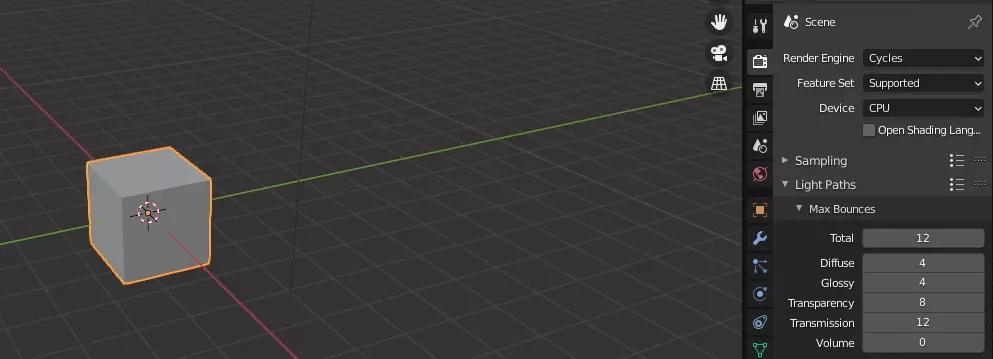
Tip #19: Decrease the Number of Light Bounces
Light bounce rate is at the maximum level as default for better image quality. However, it doesn’t need to be at this level always. If you have the flexibility to decrease Light Bounces, it will make difference for your project rendering times.
Infinite light bounces mean infinite light reflections in your project, but you can manually decrease this value from your Blender render settings to reduce your rendering times.