Video proxies are lower-resolution versions of high-quality video files. You can also call it a duplicate file of original footage. It is smaller in size and has a lower bitrate than the source footage. A long time ago, editing with proxies started in the post-production industry. Video editors used it to replace raw footage during edits. This replacement is because proxy files are easier to work with. They load faster using less processing power.
In video editing, proxies generally enable faster editing workflows. Uncompressed high-resolution video formats capture incredible amounts of detail. However, these files are large and can require a lot of resources. So, working with proxies allows you to edit the project without increasing your resource load. This also helps save time.
Aside from this, you can edit off-site, expedite export times, reduce storage requirements, and ensure smooth playback while preserving the original video quality during the editing phase. After editing, you can then export videos using the high-quality original files. These, plus other benefits, are why editors use proxies in the post-production pipeline.
The Need for Video Proxies
Why do you need to work with smaller versions of raw footage? There are many reasons, from the ability to bypass challenges related to system performance to its time-saving abilities.
Challenges of Editing High-Resolution Footage
Raw footage of high quality takes up an enormous amount of hard drive space. The space may make it slower for editing software to process, especially if you edit using a laptop or a low-end device with lag times. You need substantial processing power and storage to prevent lag times. High-resolution files like 4K videos can strain hardware, leading to longer rendering times, laggy playbacks, or potential system crashes.
Time-Saving Benefits of Using Proxies
Video proxies help to save time during high-resolution editing. By working with lower-resolution proxies, editors, filmmakers or content creators can experience smoother playback and faster editing processes, even if you are working with less powerful hardware. Proxies speed up tasks like cuts, transitions, and effects. This enables quicker decision-making and a more streamlined editing workflow. This advantage of proxies helps you meet tight deadlines and enhances overall productivity in video post-production.
Creating Video Proxies in Premiere Pro
It is possible to edit your large video files with beautiful footage without breaking your computer. Creating video proxies in Premiere Pro takes only a few clicks. Follow closely to learn in these few simple steps.
Step-by-step process to Create Proxies
- Open Premiere Pro and import your high-resolution footage.
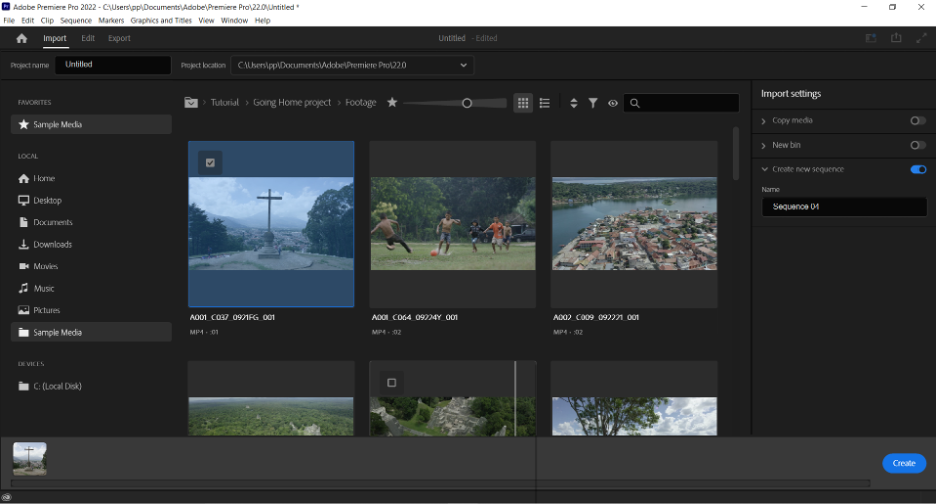
- Click on the footage or footage in the project Panel to enable the menu item.
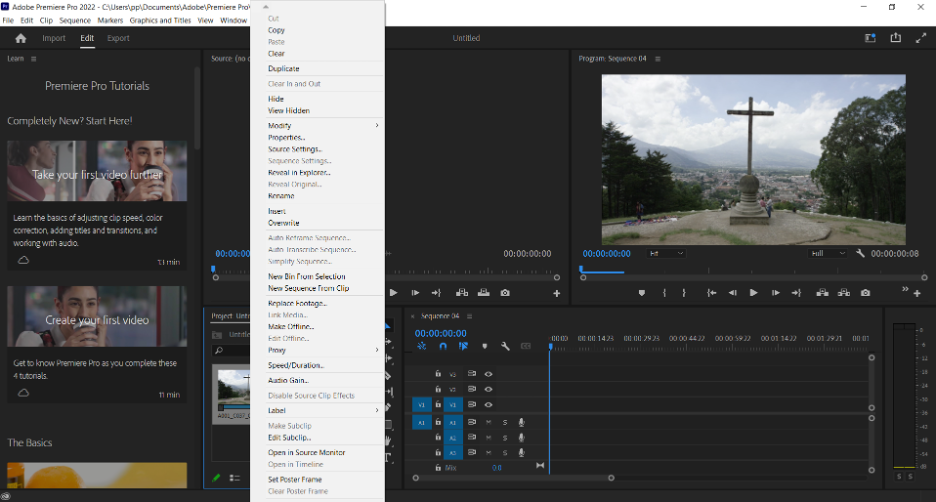
- Choose Create Proxies from the Project panel context menu to open the Create Proxies dialog.
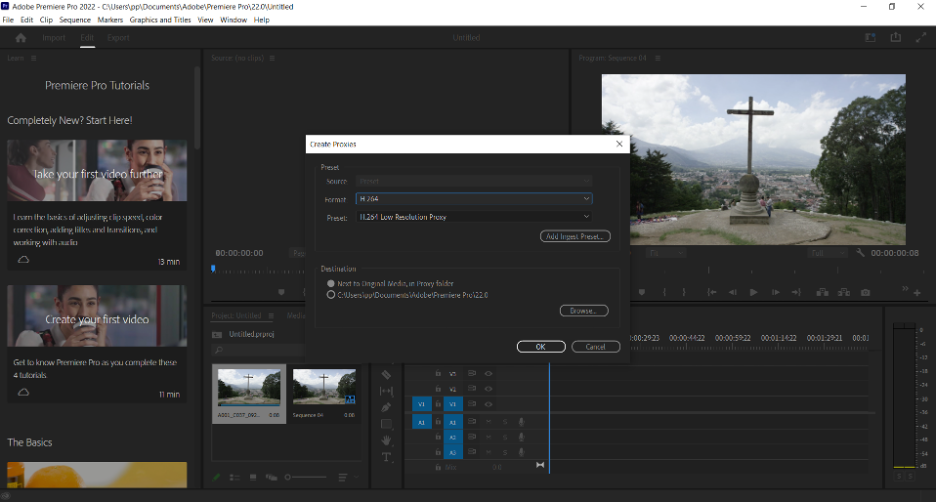
- In the Create Proxies dialog, use the default preset or select a proxy preset based on your editing needs i.e. Low-Resolution Proxies. You can also import presets by clicking the Add Ingest Preset button.

- Set the destination for the proxies. Choose a location that could be next to the raw file or a custom location.
- Click OK to apply the settings and add the footage to the Adobe Media Encoder Queue. The Adobe Media Encoder then creates the proxies for each of the project items chosen.
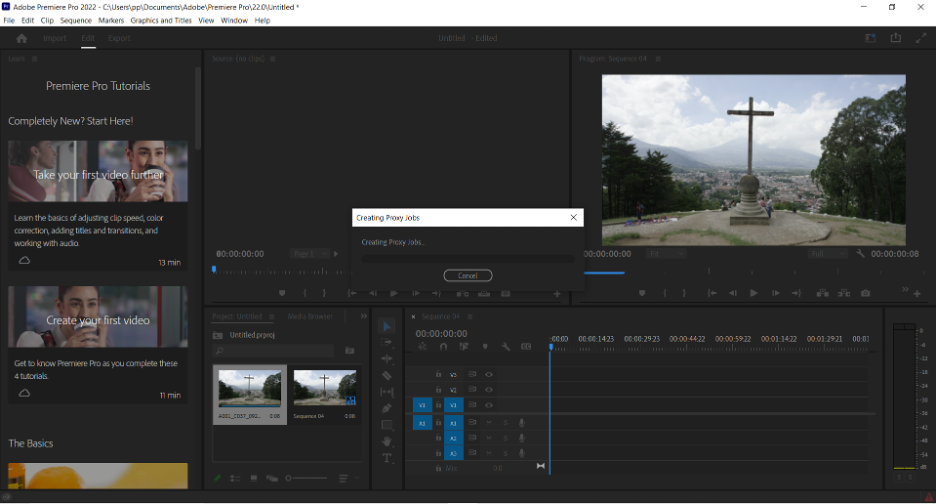
You can monitor the progress of proxy creation in Adobe Media Encoder or in the Progress panel.
Switching Between Proxies and Original File
Once your proxy files have been created, you can easily navigate between the proxy and the original file.
Head over to the Program Panel. Here, you will find the Toggle Proxies button which you can use to switch between the proxy and original files.
Note that you have to turn on your proxy videos. Once turned on, working through your timeline is smooth and lag-free.
Linking Existing Proxy File
If you already have proxies, import them into your current project. Then, right-click on the original footage, choose proxy, and select Attach Proxies. This brings up the Attach Proxies dialog box, where you can link the proxy to the original high-resolution footage.
Note that you can attach existing proxy files to original footage in the Project Panel whether or not the originals are online. Adobe has a community forum, where you can ask questions peradventure you encounter some problems during editing.
Custom Proxy Encoding Preset
- Open Adobe Media Encoder and go to the bottom left panel. Click on the “+” button to create a new encoding preset.
- You will see a dialog box where you can customize resolution, dimensions, bitrate, and codec settings. Remember to reduce the width and height of your video for a lower file size.
- Before saving this preset, you can add a watermark to help distinguish the proxy from the original footage. Click on the ‘Effects’ tab and choose ‘Image Overlay’. Select your image and adjust the size, position, and opacity.
- Save the preset with a descriptive name and click OK.
Advanced Proxy Workflow Tips
Aside from the proxy creation, some advanced proxy workflow plugins can elevate your video editing precision in Premiere Pro. Adobe has advanced features like optimizing the Ingest Preset for proxies, organizing your proxy storage, managing audio channels for proxies, and selectively creating proxies for specific timeline clips. Here are some tips.
Understanding Ingest Preset
A proxy ingest preset is similar to an encoding preset. If an ingest preset is present, you can quickly select your preferred proxy preset and let the encoding run in the background.
Start by launching Adobe Media Encoder and create a new preset with the desired output settings. You can either choose a low-resolution proxy for faster editing or a higher-resolution proxy for a balance between performance and quality.
Next, In the Preset Browser, click the “+” and select Create Ingest Preset. You will see an Ingest Preset Settings dialog box. Create a name for your preset and select a destination. Click OK to save it in Adobe Media Encoder.
Once saved, you can easily add Ingest Preset to your project.
Managing Audio Channels for Proxies
Premiere Pro has a built-in proxy creation workflow that automatically matches the channelization and sample rate of your raw footage.
However, you have to ensure that the audio channels are correctly assigned to maintain synchronization with the original high-resolution footage. The number of audio channels needs to match when attaching proxies. Multichannel audio would work if you use a Preset like the QuickTime ingest preset and leave the audio values to their defaults.
Then, adjust the audio settings in your proxy preset to balance file size and quality. Lower bitrate or sample rates may be acceptable for proxies while editing. During your editing timeline, you can switch between proxies and the original footage to monitor and adjust audio more accurately.
Creating Proxies for Timeline Clips Only
You may want to create proxies only for specific timeline clips. Here’s a tip on how to do that.
- Go to “File” > “Project Settings” > “Ingest Settings.”
- Next, Drag the clips you want proxies for onto the timeline.
- Right-click the Ingest button in the Project Panel, enable “Ingest” and select “Create Proxies.”
- Choose the desired proxy preset for the selected timeline clips. Premiere Pro will create proxies only for the clips in the timeline.
Enhancing the Editing Experience with Vagon
Video proxies help you edit better. Having a cloud service for storage even makes your video editing workflow better. Vagon is a cloud-based computing solution designed to improve your editing experience. You enjoy smooth playback and real-time editing, even with high-resolution or 4K footage. Users experience faster rendering times with Vagon’s powerful cloud infrastructure. Also, Vagon allows you to edit from virtually any device with an internet connection, providing flexibility for on-the-go editing or collaboration from different locations.
In terms of cost, you only need to pay for the computing resources you use, eliminating the need for significant upfront investments in high-end hardware. In addition, working on the cloud comes with risks. Vagon, however, prioritizes the security of your projects. They ensure data safety and privacy throughout your editing process.
Conclusion
In conclusion, the use of video proxies gives you effortless editing by providing lower-resolution versions of high-quality video files. With proxies, you can have sharp playbacks and a fluid experience while making adjustments to your projects. Also, proxies enable faster rendering and export times. When you initiate the final export, Premiere Pro switches back to the original high-resolution files without compromising the final video quality.
When working with proxies, you can share lower-resolution proxy files among other editors. This makes it more practical to collaborate over networks or online platforms. When you integrate Vagon’s cloud service, you can reduce storage requirements and optimize system resources.
Editors can create proxies for 4K footage when they use the dedicated Nvidia GPUs for accelerated processing. Nvidia GPUs are high-performance systems to leverage when you opt for Vagon services. Our cloud-based computing ensures a cost-effective smooth performance, overcoming hardware limitations even with high-end tasks. Contact Vagon today for an unparalleled editing experience on the go.