One really cool thing about Blender is the very wide feature palette. You can do anything from modelling, to 3D printing, to creating high-end visual effects. And if you somehow reach any limitations, there’s probably already an add-on to get around it.
Add-ons are software extensions which aren’t included in the default version of the program. There are two kinds of add-ons: ones which are already included in the download of the software and just have to be enabled in the settings, and others you first have to download from an appropriate website. Blender has a reputation for its vast amount of compatible add-ons.
This is why we want to give you an overview of the most important pre-installed add-ons, which is especially recommended to enable.
How to enable Add-ons
You can find all the integrated add-ons listed in the user preferences. To get there, search for the Edit menu in the top left corner, select Preferences and choose the Add-ons tab on the left side. Here you’ll find a directory with all of them. You can either scroll through the list or use the search bar on the top right, to get to the one you want to enable. Once found, you just have to check the box next to the name to activate it. Click on the little arrow next to it to open up more details about the add-on. When you are done, press on the button in the bottom left corner and press control if Auto-Save Preferences is enabled to make sure the changes are saved.
All add-ons are listed up in the user preferences.
Essential Pre-Installed Add-ons
1. Node Wrangler
The Node Wrangler is my favourite add-on, since it makes the shading and compositing process so much faster and easier. It basically adds extra shortcuts to help you with the most common tasks when dealing with nodes. Here are the most essential shortcuts:
Ctrl + Shift + Left Click on a node: Preview the output of the selected node. Click multiple times on the same node to scroll through the different outputs. This is really helpful to compare various parts of your node tree.
Ctrl + T while a node with a vector input is selected: This adds a texture coordinate and mapping node.
Ctrl + Shift + T with a Principled BSDF node selected: This opens up a file browser. Then you simply have to select all textures of a material and it automatically arranges them in a pbr setup!
Ctrl + Shift + Drag from one node to another: Quickly combine two nodes with a mix shader or mix rgb node.
There are tons of additional useful shortcuts that come with the Node Wrangler. All of them are listed on blender.org/manual.
2. Copy Attributes
What is the most well known PC shortcut? I’m pretty sure it is Ctrl + C and Ctrl + V. This isn’t really surprising, since it is in human nature that we hate to do the same thing over and over again. That’s exactly where the Copy Attributes add-on supports you by making the copy and paste tool inside Blender more effective.
If this add-on is disabled you can only copy objects, but when active you can choose exactly which properties you want to copy from one object to another, including transformations, constraints, modifiers, etc.
To use it, select as many objects as you want. Hold down shift while left clicking to select multiple objects at the same time. The one you click on last has to be the object with the attributes you want to copy. Then press Ctrl + C and choose what you want to copy.
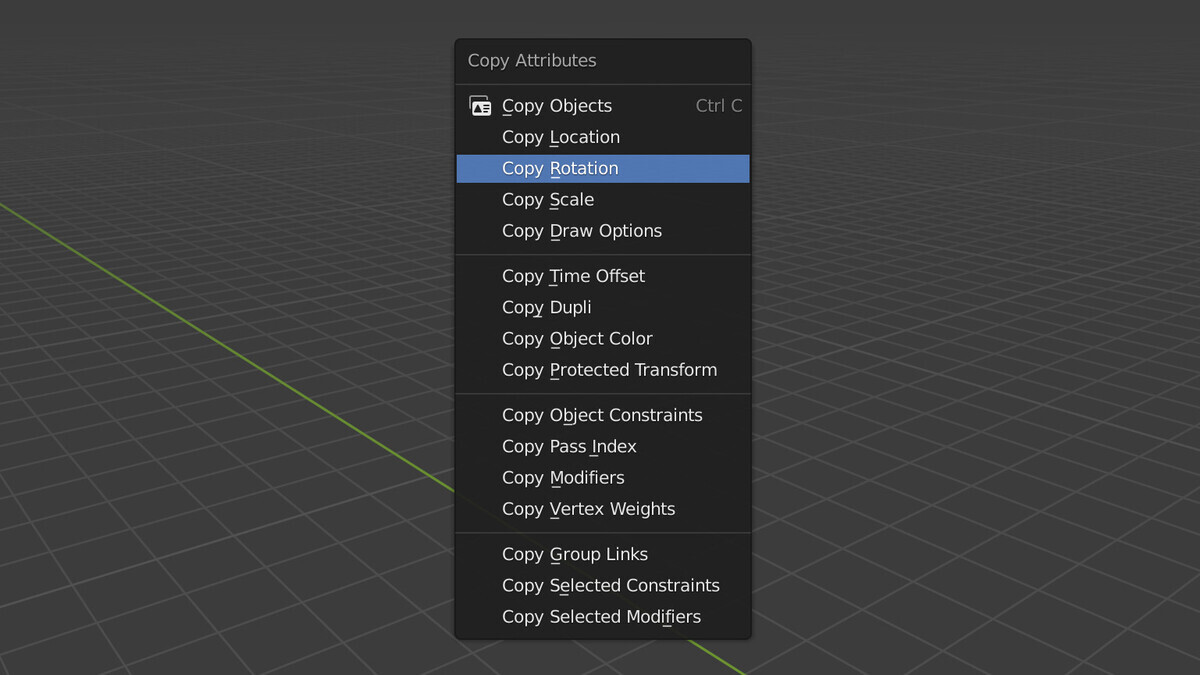
The Copy Attributes menu after pressing Ctrl + C.
3. A.N.T.Landscape
Creating landscape renders in Blender can be a lot of fun, especially if you use the A.N.T.Landscape add-on. When you have it enabled, you just have to press Shift + A and choose Mesh > Landscape. After adding it to the scene press F9 on your keyboard to open the landscape menu. It has a lot of customizable parameters and some great presets to choose from. As soon as you enter edit mode or transform the object, the settings will be fixed and can’t be changed anymore.
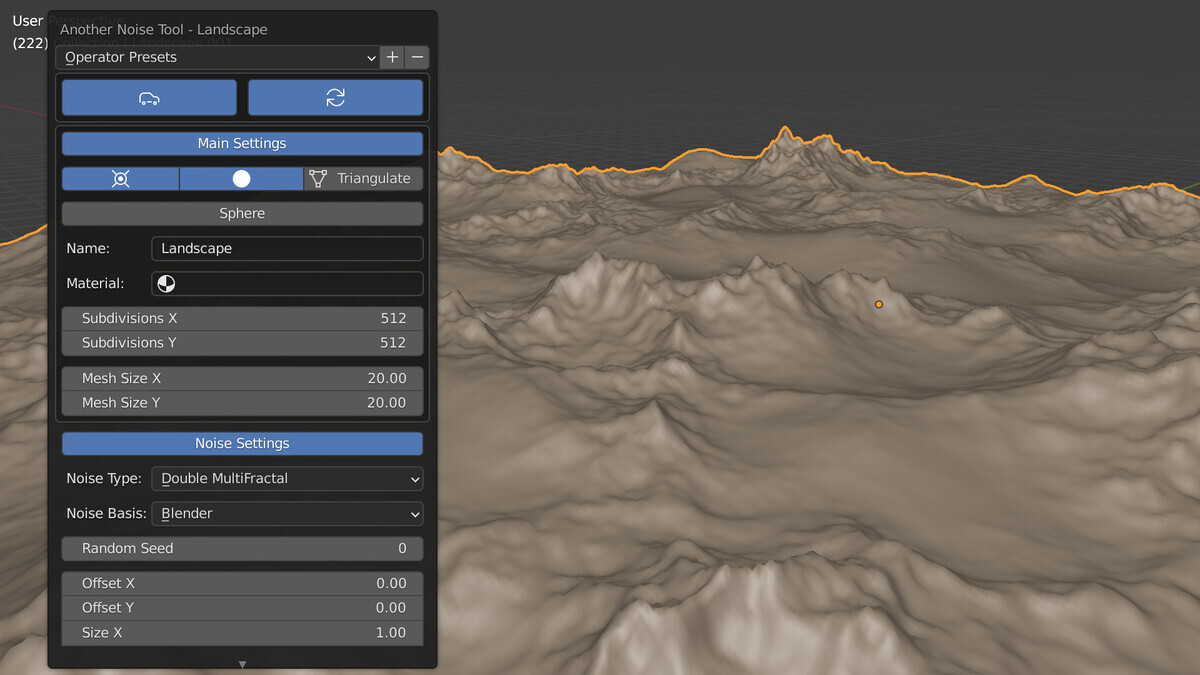
Landscape created with the A.N.T.Landscape add-on.
Explore Add-ons on a High-Powered Cloud with Vagon
Discovering add-ons is just the start. Vagon’s high-performance remote desktops offer the ideal environment for you to explore and utilize these add-ons to their fullest, free from any system limitations. Imagine sculpting, animating, and rendering your creations seamlessly, no matter the device you’re on.
4. Extra Objects
Enabling this Blender extension provides you with even more objects in the Add > Mesh menu. You’ll get a rock generator, special torus objects, math functions, pipe joints, single vertices, diamonds and much more! It is definitely worth going through them, to check if there’s anything useful for your project.
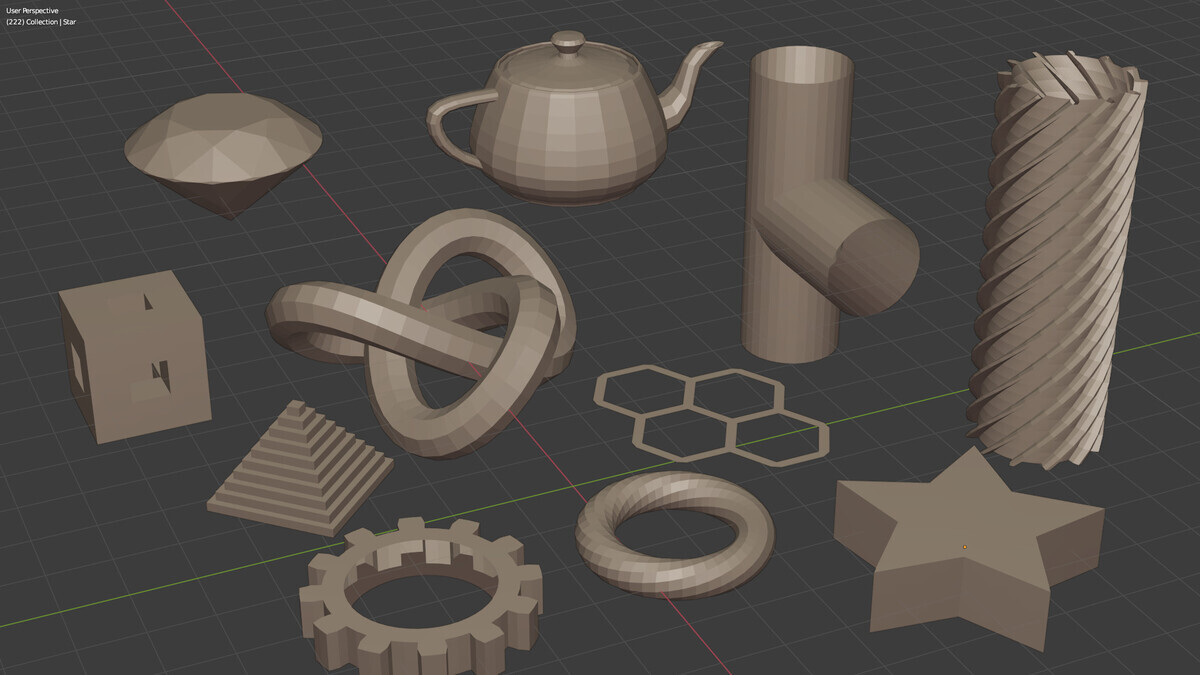
A few of the extra objects you get with this addon. They are all customizable.
5. Blenderkit
Blenderkit is an online library with tons of 3d objects, materials, and brushes. This add-on adds a search bar into the 3d viewport, which lets you quickly search for assets and add them directly to the library. It is free, but there’s also a subscription version, to get access to even more assets and cloud storage for your own objects and shaders.
Blenderkit enables you to search, download and import models, textures and brushes inside the 3d viewport.
6. Modifier Tools
This is a very simple but useful add-on. It adds four buttons on top of the modifier stack. Applying, deleting, disabling the preview, or opening/closing them all at once has never been that easy!
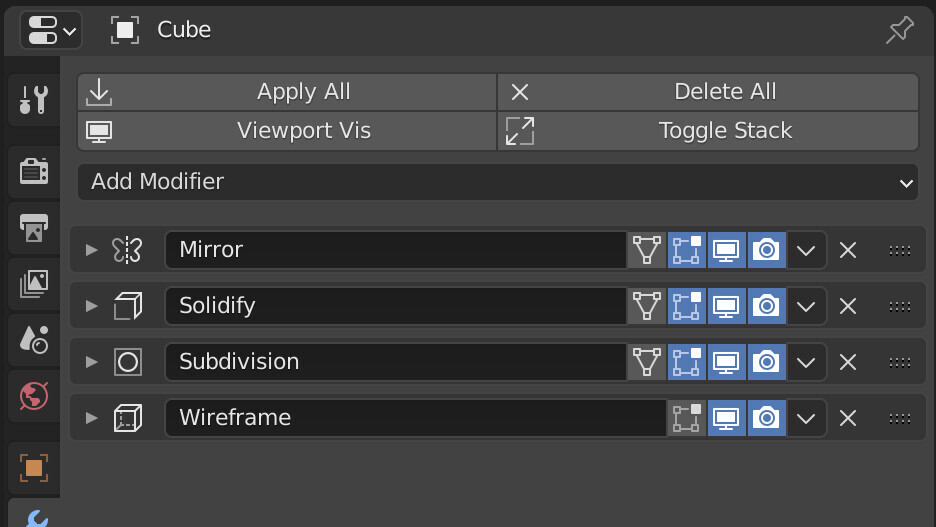
This add-on adds four useful tools to the modifier stack.
7. Image as Planes
There are various reasons why you would want to import images projected onto planes into your scene. One of them is “cheating” and using an alpha masked image, instead of a 3D object, to save hours of modelling and rendering time. If you have the Image as Planes add-on enabled, you just have to press Shift + A, and select it in the Image tab. Now you can choose an image from the file browser and Blender automatically maps it onto a plane in the correct aspect ratio. Before you press Import images as Planes in the file browser, you have the possibility to set a few import options. For example you can choose how the material should be shaded, toggle the transparency, or define where it should be placed.
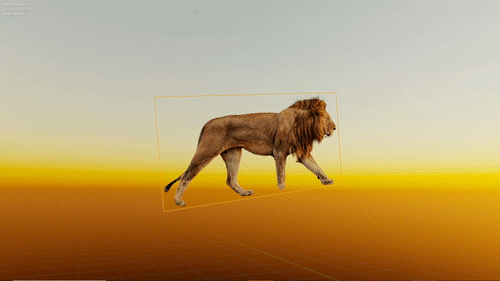
The Lion in this scene is just an image projected on a plane.
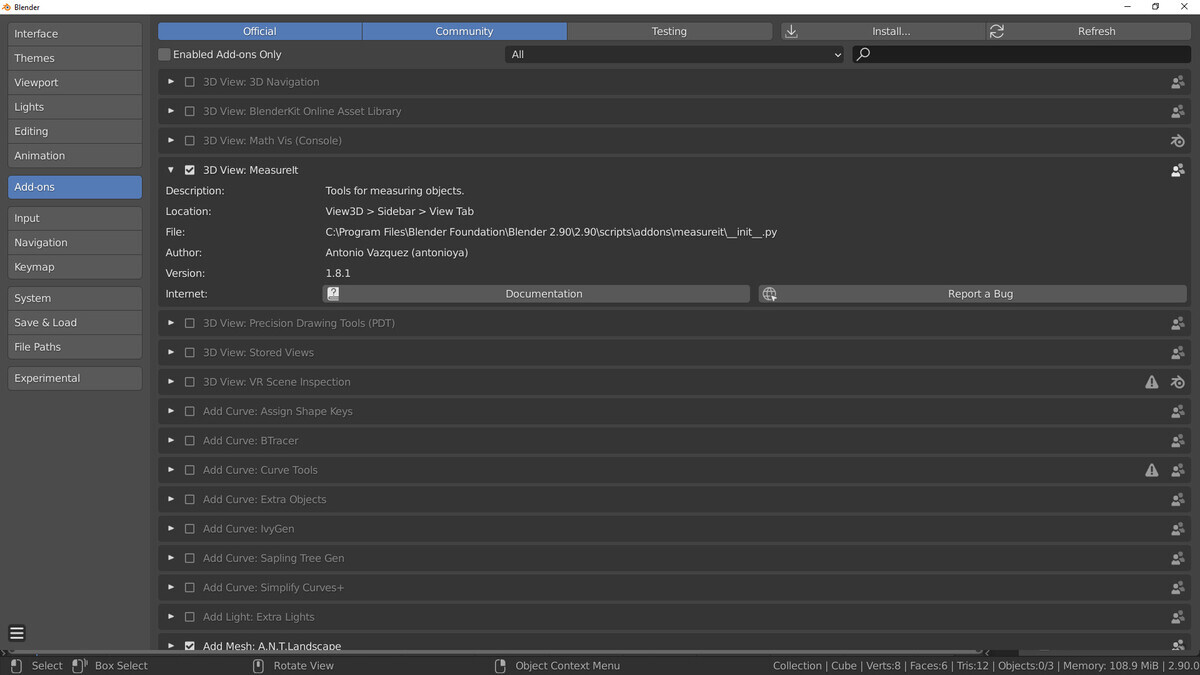
8. MeasureIt
If you model something on a real world scale, measuring is essential. Blender has some measure options in the viewport overlays and in the tool settings; however, their functionality is quite limited. Fortunately there’s also a dedicated add-on for that. When enabled, you’ll find the MeasureIt tools in the N-Panel (the panel in the 3d viewport that opens up when you press N on your keyboard) under the View tab. Enter edit mode to add measurements, select the corresponding parts and select a Segment, Angle, or Area measurement from the add-on. MeasureIt has a lot of powerful tools and options for every application. It is worth trying it out and getting a feel for what it is capable of.
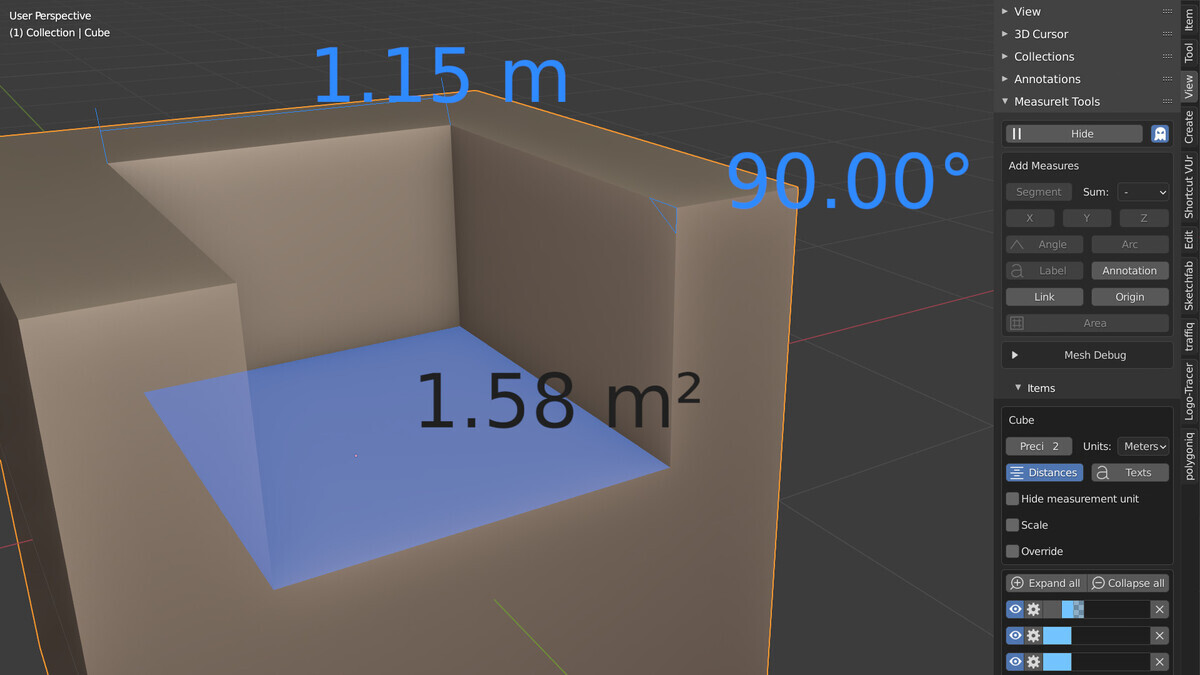
The MeasureIt add-on in action.
We hope this article expands your horizon on what is possible with Blender.